

Water was splashing from the ceiling like a shower head gone wild. The floor felt slick. The dog was barking. In moments like this, clear steps matter more than calm words. Here is a simple plan that works in real homes across Port Clinton. First, stop the water. Then, make the area safe. Next, limit damage. Finally, bring in help fast. A main shutoff valve is the handle or wheel that stops water to the whole home.
If you are asking what to do if a pipe bursts in your home, act immediately: shut off the main water, switch off power to any wet rooms if it is safe to do so, open faucets to drain pressure, and begin drying. These four steps protect people first and reduce damage while professional help is on the way.
Key Takeaways
- Shut water off at the main, cut power to affected rooms if safe, and start pressure relief immediately.
- Stabilize the area: contain flow, protect walkways, and move valuables.
- Begin water removal and active drying within 24–48 hours to lower mold risk.
- Call a licensed plumber for diagnosis, repair, and safe system restart.
- Document damage with photos, notes, and receipts for claims.
Spotting a Burst Pipe: Fast Warning Signs and Immediate Safety Checks
A true burst sends water fast. You may notice a sudden loss of water pressure, a ceiling bulge, or a spray from a wall or cabinet. A slow leak often leaves stains, a musty odor, or a small puddle that slowly spreads. Both require attention, but a burst needs action right now. A pressure gauge measures pounds per square inch (psi), and sharp spikes can split weakened pipe or fittings.
Confirm the source if you can see it. Look under sinks, along a basement ceiling, and wherever pipes run through exterior walls. If the area is hidden, listen for hissing or rushing water. Check the water meter; if the dials move while every faucet is closed, water is flowing where it shouldn’t.
Before you go further, think safety. Water and electricity do not mix. If the breaker panel is dry and safely reachable, shut power to wet rooms. Never step into water to reach a panel. If you are unsure, wait for a licensed pro. Watch for sagging ceilings and softened floors. A bulging ceiling can fail without warning. Keep kids and pets out of the area.
How to confirm a burst vs. a slow leak
Run a quick test. Close all fixtures. Note the meter. If it changes within 10–15 minutes, a hidden leak exists. A burst often makes noise and produces visible water flow. A slow leak seeps or drips and may stop when you close a nearby fixture valve.
Electrical and structural safety before you act
Use a non-contact voltage tester if you have one. Avoid standing water. Do not poke at a sagging ceiling. If you smell gas, leave the property and call your utility from a safe place.
The First Five Minutes: Shutoffs, Stabilization, and Quick Containment
Find the main shutoff. In most US homes, it sits where the water line enters the house: near a front foundation wall, in a basement, crawlspace, or garage, or in a ground box at the street. A ball valve turns a quarter turn; a gate valve turns clockwise until snug. Isolation valves under sinks and at toilets can cut water to a single line and help during testing.
Once the main is closed, open cold taps on upper floors first, then lower floors. This drains lines and relieves pressure. Flush toilets once. For hot water systems, switch the water heater to vacation or off and let it cool before touching any valves. This protects the tank and helps avoid scalding.
For quick control, simple tools help. A pipe clamp, rubber patch, or even a wrapped bike inner tube with a hose clamp can slow a small split on copper or galvanized pipe. These are temporary measures. They buy time until proper repair. For PEX or PVC, avoid heat and keep the area stable and dry.
Relieve pressure carefully. Do not operate the water heater when the main is closed; ensure its power or gas is off. Place buckets under drips. Lay towels to keep water from running into ducts or under baseboards.
Finding and closing the main water shutoff and isolation valves
Trace the line from your water meter. Look for the first valve inside. Label it for next time. Under fixtures, quarter-turn valves sit on supply lines. Turn handles clockwise to close. If a valve is stuck, do not force it; it can snap and worsen the problem.
Simple stopgaps: pipe clamps, rubber patches, and pressure relief
Wrap a burst section with rubber, then add a clamp. Tighten until the drip slows. Open a nearby faucet to reduce line pressure. Remember: this is only a stopgap. A licensed plumber should replace or properly repair the failed section.
Protect People and Property: Priorities, Salvage, and Documentation
Set priorities. People first, then pets, then key items. Move electronics, documents, photos, rugs, and light furniture out of the wet zone. Raise wooden furniture on blocks or foil to keep legs off damp floors. Pull area rugs to a dry space to prevent dye transfer.
Make the area safe to walk. Water creates slip, trip, and fall hazards. Tape off slick entries. Wear nonslip shoes. Coil cords and keep tools up off the floor. Do not carry heavy items across wet tile or wood.
Save what you can. Porous items like drywall and insulation absorb water quickly. Nonporous items like metal, glass, and sealed wood tolerate short exposure better. Bag small wet items for later cleaning. Keep damaged pipe parts if it is safe; they can help the plumber assess the cause.
Document without delay. Take wide and close photos and short video clips. Note rooms, dates, and angles. Capture the source area, standing water, and damage to floors, walls, cabinets, and belongings. This record helps with claims. Do not slow the response to stage images. Keep receipts for fans, dehumidifiers, and supplies.
What to move first and how to prevent slip, trip, and fall hazards
Move electronics and papers first. Unplug devices only if they are dry to the touch. Set up clear walk paths. Use mats at entries. Add simple signs for family or tenants. Good lighting helps you spot puddles and cords.
Documenting damage for insurers without slowing the response
Shoot photos quickly from several angles. Name files later. Jot notes in your phone. Keep a short timeline: when you found the leak, when water was shut off, and steps taken to dry.
Water Removal and Drying: Preventing Mold, Rot, and Hidden Moisture
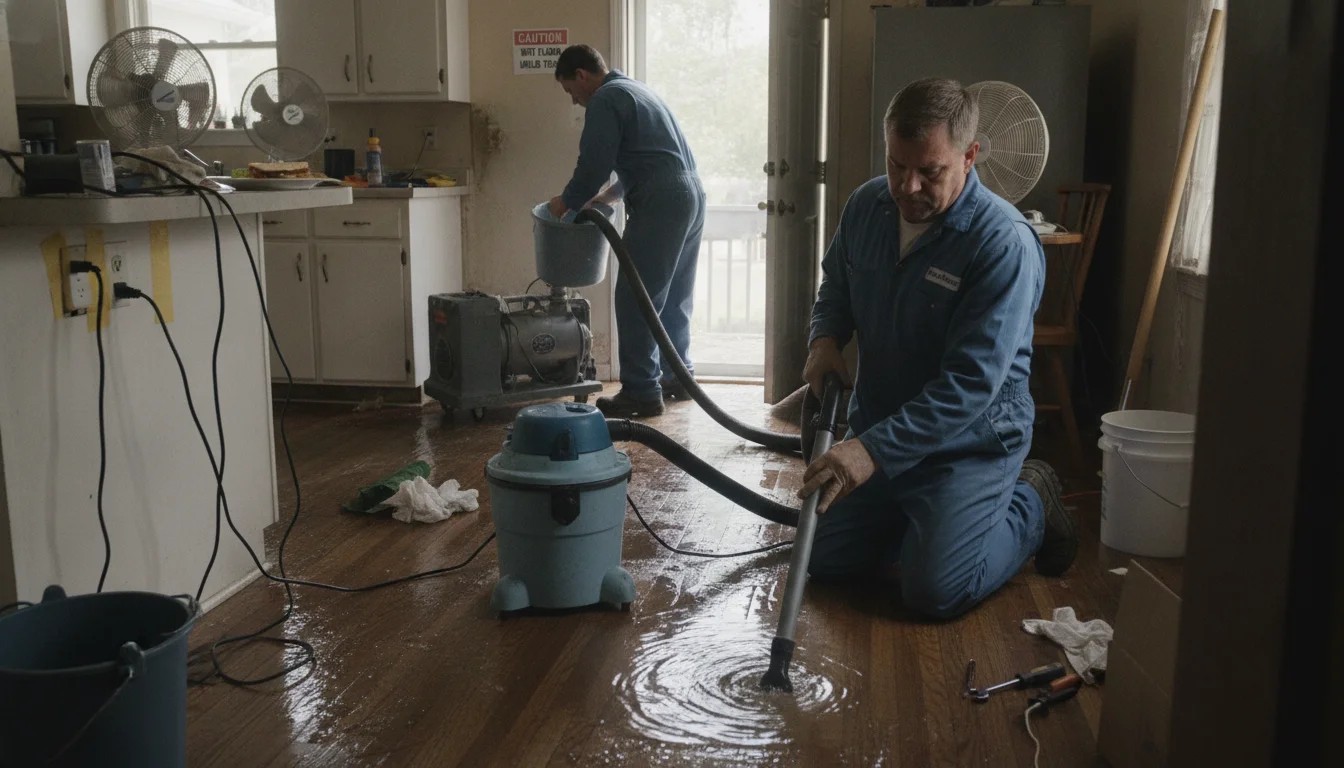
Start water removal as soon as it is safe. For small pools, mops and towels work. A wet/dry vac removes water quickly and can handle shallow flooding. For deeper water, a transfer pump or utility pump moves gallons fast. Pull baseboard gently to let walls breathe if you are trained to do so.
Drying is a race against time. Mold can start within 24–48 hours if materials stay damp, according to the CDC’s guidance on mold growth in wet buildings (CDC). Increase airflow with fans. Cross-ventilate by opening windows when outdoor air is dry and cool. Run a dehumidifier to pull moisture from air and materials.
Focus on hidden spots. Water travels under plates, into wall cavities, and along flooring seams. Check under cabinets, inside closets, and around floor vents. Use a moisture meter if you have one; it reads dampness in wood and drywall.
Aim for steady progress. Remove wet rugs for separate drying. Keep furniture on blocks. Replace saturated insulation and cut out ruined drywall in a straight line to ease later repair. Never mix bleach with ammonia. Ventilate well if using cleaners.
Extraction tools that work (mops vs. wet/dry vacs vs. pumps)
Use mops for small spills. A wet/dry vac speeds up small to mid-size jobs. Pumps are for larger volumes. Always plug tools into dry outlets away from water. Empty the vac often to keep suction strong.
Ventilation, dehumidification, and the 24–48 hour mold window
Run fans and a dehumidifier together. Close windows when outside air is humid. Target the dampest areas first. Check progress every few hours. If materials remain wet beyond a day, consider professional drying to avoid mold and rot.
When to Call a Licensed Plumber: Urgency Levels and What to Expect
Call a licensed plumber when the main is off, the source is unknown, pressure will not stabilize, or damage is beyond simple patches. Fast help limits loss and protects plumbing fixtures like Water Heater Repair, Toilet Repair, and Sink Repair from follow-on issues. If the break involves gas lines, leave and call your utility from a safe location.
Have details ready. Share the shutoff location, pipe type (copper, PEX, PVC, galvanized), what fixtures failed, and whether power is off to wet rooms. Note visible ceiling bulges or floor buckling. Say if anyone is sensitive to mold. Clear a path to the work area.
On site, the plumber will inspect, test, and plan. Pressure testing finds weak points. Thermal cameras and acoustic tools can reveal hidden leaks. Expect options: cut-and-replace a section, add proper fittings, install new isolation valves, or re-route a line. For freeze damage, they may thaw, test, and insulate.
Expect clear guidance about drying and restoration next steps. If the water heater ran dry or overheated, request a safety check. A failed temperature and pressure relief valve is dangerous. Radiator Repairs in hydronic systems and Garbage Disposal Repair in kitchens may also need inspection after a flood.
What information to have ready for triage and dispatch
Provide address access details, best contact window, and parking notes. Share photos if asked. Tell them the main is off and the power status. Mention pets and any special-needs occupants.
On-site diagnosis, pressure testing, and typical repair methods
Repairs may use push-to-connect fittings, soldered copper, or crimped PEX. The choice depends on code and pipe type. After repair, the plumber will repressurize lines, bleed air, and check for leaks at fixtures.
Why Pipes Burst and How to Prevent It Happening Again
Pipes fail for a few common reasons. Freezing is a major one: water expands as it turns to ice and can split pipes. Pressure spikes also stress weak sections. Corrosion thins metal over time. Installation errors leave unsupported spans or poor joints that fail under load. Hot water systems face additional heat stress.
Prevention starts with basics. Insulate pipes in attics, garages, and exterior walls. Seal drafty gaps near sill plates. Maintain steady heat in winter, even when away. Let faucets drip during deep cold to keep water moving. A pressure-reducing valve can tame high street pressure.
Water quality matters. Hard water and corrosive conditions wear pipes and water heaters. Regular Water Heater Repair and anode rod checks help protect tanks from rust. A corroded anode rod allows a tank to degrade faster; replacing it on schedule helps extend service life per manufacturer guidance. If you travel, close the main and drain lines during long trips.
Upgrades add protection. Install smart leak detectors and auto-shutoff valves that close when they sense unusual flow. Replace old galvanized steel with PEX or copper where code allows. Add accessible isolation valves on key branches for faster control.
Freeze risk, pressure spikes, corrosion, and installation errors
Exterior walls and crawlspaces are high risk in Port Clinton winters. Poorly supported spans can vibrate and crack. High psi wears washers and joints. Corrosion may show as green or white crust on copper and brass. Fix hangers and supports before they fail.
Upgrades and maintenance that actually reduce risk
Insulate, seal, and add heat tape where allowed. Test home pressure annually. Service water heaters and replace aging supply lines to fixtures. Leak Detection Services with monitoring can catch small issues early. Proactive Drain Cleaning can also help by ensuring drains are clear before storms or thaw cycles add sudden loads to your systems.
Insurance, Cleanup, and Restoration: Coordinating the Aftermath
Most homeowner policies cover sudden accidental discharge from plumbing, but not long-term neglect. You have a duty to mitigate loss. That means shutting water off, starting drying, and preventing additional damage. Keep your notes and photos handy when you call your insurer. Ask about preferred restoration vendors and timelines.
Restoration unfolds in phases. First is mitigation: remove water, dry, and disinfect. Next is evaluation: check structure, electrical, and HVAC. Then rebuild: replace drywall, insulation, trim, cabinets, and flooring as needed. Drying can take days. Rebuild may take longer based on scope and material lead times.
Plan reoccupancy with safety in mind. Only restore power to rooms that are dry and inspected. Replace any swollen or crumbled drywall. Test outlets and GFCIs in wet areas. Have a licensed electrician assess if panels or wiring got wet. For mold beyond a small patch, consider a remediation pro following EPA guidance on cleanup and moisture control (EPA).
Port Clinton Plumbing works across Port Clinton every week to handle urgent pipe repairs, leak checks, and cleanup coordination. Many homes in the Port Clinton area also face freeze risk and aging lines. A steady plan, quick calls, and clean records speed claims and help protect property value. You can count on Port Clinton Plumbing to guide you through each step from triage to repair.
Filing a claim, mitigation duties, and preferred vendors
Call your insurer after you take emergency steps. Share photos and your timeline. Ask about mitigation partners and next steps. Keep damaged parts when safe. Save receipts for fans, dehumidifiers, and supplies used.
Drying timelines, rebuild scope, and when it’s safe to reoccupy
Rooms must be dry, clean, and tested before full use. Expect moisture checks before closing walls. Rebuild scope depends on how high water wicked up walls and how long it sat.
Frequently Asked Questions
-
How do I find the main water shutoff fast?
Look along the inside of the wall that faces the street, in a basement, crawlspace, garage, or a ground box near the curb. Label it once found. In condos, ask building staff. Isolation valves under sinks and at toilets can stop water to one fixture while you wait. -
Can a water heater be damaged by a burst pipe?
Yes. If cold supply was cut while the burner or elements ran, the tank can overheat. Turn the water heater off during an emergency. Have a plumber check the temperature and pressure relief valve and the anode rod. Water Heater Repair helps return the system to safe service. -
What about toilets and sinks after a flood?
After water is back on, run taps to clear air and sediment. Check under-sink supply lines and traps for drips. Flush toilets and watch the base for leaks. If any fixtures act up, schedule Toilet Repair or Sink Repair to prevent more damage. -
Are there reliable plumbing companies in Port Clinton?
Yes. Look for a local firm with emergency service, solid reviews, and clear communication. Port Clinton Plumbing serves homes and businesses and nearby areas with Leaks & Burst Pipes help, fast triage, and quality repairs. -
When is it safe to open walls after a leak?
After water is off and the area is stable, you can remove wet baseboards and small drywall sections if trained. Dry first, then rebuild. If you see mold or smell must, pause and get guidance. Follow safe cleanup steps from federal health resources (CDC).
Key takeaways
- Shut off water, cut power to wet rooms, and protect people first.
- Drain lines and apply a temporary clamp only to buy time.
- Start drying within 24–48 hours to lower mold risk.
- Call a licensed plumber for diagnosis and lasting repair.
- Document damage and begin mitigation to support insurance.
Conclusion: A burst pipe is stressful, but a calm plan works. Stop the water, make it safe, and dry fast. Then get expert help to fix the cause and prevent a repeat. For urgent help across the main Port Clinton area — from Downtown Port Clinton and Catawba Island to Oak Harbor, Marblehead, Lakeside, Sandusky, and nearby Lake Erie communities, Port Clinton Plumbing is ready to respond. Contact us.
If you are not sure which of these you are dealing with, it is worth having someone look at it before it turns into a bigger job. Port Clinton Plumbing can assess the situation and explain your options clearly.
If you are not sure which of these you are dealing with, it is worth having someone look at it before it turns into a bigger job. Get in touch with Port Clinton Plumbing today and we will tell you where you stand.