

A faint hiss, a drip you can’t see, or a bill that crept up—these are classic early signs of trouble. Here’s how to find a water leak in your house quickly and safely: confirm with a meter test, shut off water to limit damage, then work methodically from easy checks to targeted isolation. A water leak is any unwanted flow from your pressurized supply or from drains, and the steps below explain how to pinpoint it without tearing into walls too soon. In Port Clinton, steady, coastal humidity and lake-effect weather can hide moisture in materials, so move deliberately and document what you find.
Key Takeaways
- Start with the meter test to confirm hidden supply leaks without guesswork.
- Protect safety first: turn off water and cut power to wet areas before inspection.
- Isolate zones with shutoff valves and timed tests to narrow the search.
- Know when to call a licensed plumber for hidden, slab, or risky locations.
- Prevent repeats with pressure control, routine checks, and smart leak sensors.
Table of Contents
- The Fast Answer: Confirm a Leak Safely and Stop the Damage
- Spot the Clues: Interior and Exterior Signs of a Water Leak
- Tools That Help: Simple Gear vs. Pro Instruments
- Step-by-Step Hunt: Track the Source Without Tearing Walls
- Hidden and Hard-to-Reach Leaks: Walls, Ceilings, Slabs, and Crawlspaces
- Found It—Now What? Mitigation, Drying, and When to Call a Pro
- Prevent the Next Leak: Maintenance, Pressure Control, and Smart Monitoring
1. The Fast Answer: Confirm a Leak Safely and Stop the Damage
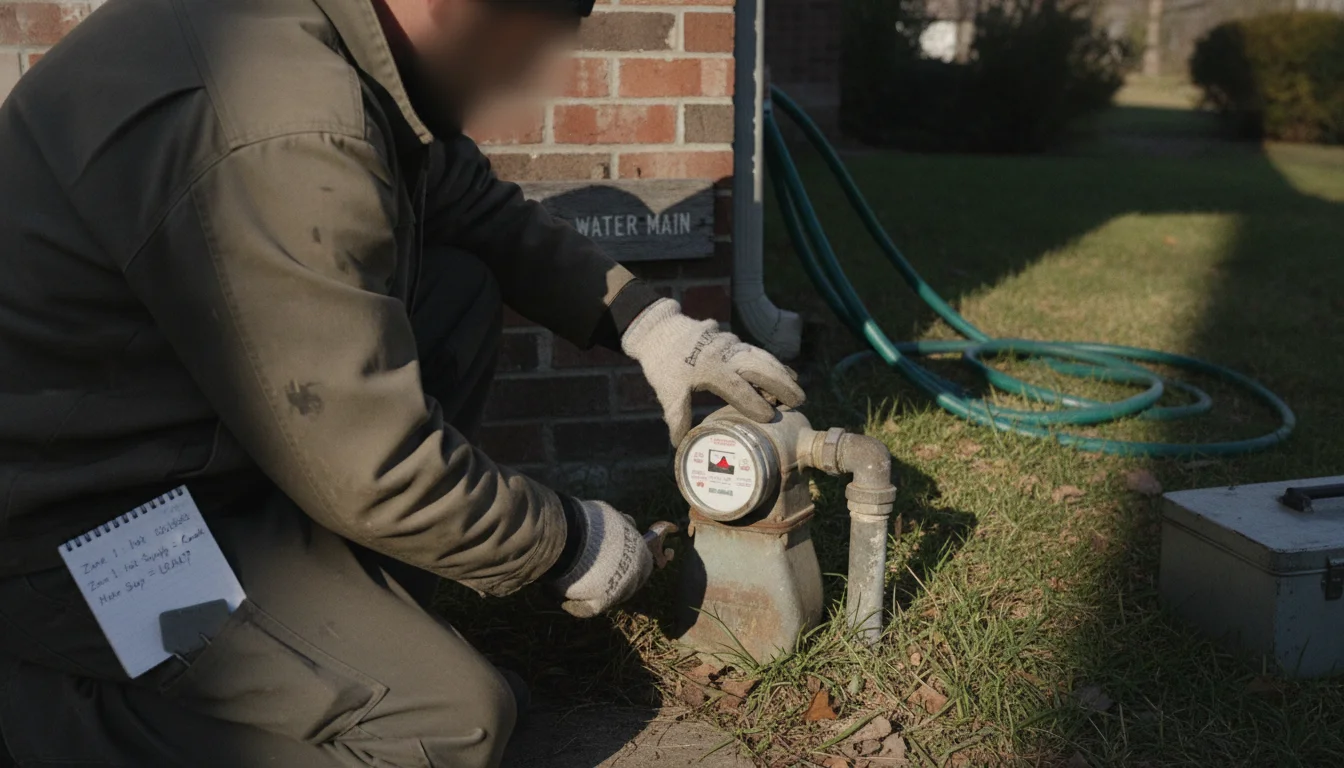
When time matters, begin with the meter test. Your water meter records total use, and most have a small leak indicator—a tiny dial or triangle. Turn off every tap, fixture, and water-using appliance. Make sure toilets are not refilling. Wait a minute, then watch the indicator. If it moves while all use is off, you likely have a hidden supply-side leak.
Next, limit damage. Find the main shutoff—usually where water enters the home: a basement, utility room, garage, or at a curb box. Turn a round handle clockwise to close. For a lever valve, turn a quarter turn until the handle sits perpendicular to the pipe. If water is near outlets or the electrical panel, switch off power to that area at the breaker. Water and live electricity are a dangerous mix—safety always comes first.
With the main closed, wait ten minutes and check the meter again. If the leak indicator stops, the problem sits on your house-side supply. If it still moves, the service line between the meter and the structure may be leaking. Record readings, snap a few photos, and jot notes. That log helps a licensed plumber plan the best access and repair method.
If you must leave water partially on for essentials, crack the main valve and monitor it. Stage buckets, towels, and a mop. Slide a tray under any active drip and move rugs or furniture off damp spots. Small, calm actions reduce spread while you track the source.
2. Spot the Clues: Interior and Exterior Signs of a Water Leak
Leaks leave a pattern. Start inside where water lives. In bathrooms, check for loosened caulk, soft flooring beside the toilet, and stains or swelling inside the vanity. Run the shower and look at the ceiling below for fresh spotting. In kitchens, open the sink base and inspect shutoff valves, braided lines, and the garbage disposal body. Wipe with a dry towel—if it comes back damp, you’ve confirmed moisture. In a laundry area, look closely at washer supply hoses and the drain hose; cracked rubber or rusted clamps often signal a slow seep.
Basements often tell on leaks. Watch for damp vertical lines, chalky white deposits called efflorescence, and rust at copper joints. A sump pit that runs in dry weather can hint at a plumbing leak rather than stormwater. In attics, look for darkened sheathing and insulation that feels heavy or matted. Roof leaks can imitate pipe leaks; note whether stains grow after rain or during long dry stretches.
Outdoors in Port Clinton, walk the path from curb to home where the service line likely runs. A bright green patch during a dry week or soggy soil near the foundation can point to a buried line issue. Check irrigation valves and backflow devices for faint hissing or persistently wet boxes. Watch the curb for flow that doesn’t stop. If your meter indicates use with sprinklers off, the irrigation system might be the culprit.
Scan slab edges and foundation. Hairline cracks alone are common, but damp, musty zones or a warm streak across finished flooring can mark a hot-water line leak under the slab. Note odors, bubbling paint, peeling baseboards, and warped trim—these clues help narrow where to open if needed.
3. Tools That Help: Simple Gear vs. Pro Instruments
You can get far with simple gear. A bright flashlight reveals sheen on fittings in dim spaces. Towels and paper towels show weeping joints—place a dry towel under a suspect connection and recheck in an hour. Dye tablets or a few drops of food coloring in a toilet tank make flapper leaks clear: if color appears in the bowl within ten minutes without flushing, the flapper isn’t sealing. A basic moisture meter compares a suspect area to a known dry surface to confirm dampness.
Use a non-contact voltage tester when water is near wiring—it gives you a heads-up before you touch anything. A small mirror lets you view the back of P-traps and shutoffs. Painter’s tape and a marker help tag damp spots with time notes. Simple, safe tools keep your process steady and reduce guesswork.
Pros turn to advanced instruments when signs get murky. Acoustic listening gear detects leak noise through walls, floors, and slabs. Thermal imaging maps temperature differences—warm or cool bands can mark active lines or saturated zones. Tracer gas fills a closed line with a light, safe mix; detectors pick up where gas escapes and pinpoint the leak. These methods reduce exploratory cuts and protect finishes.
When signs are vague or opening the area is risky, consider scheduling Leak Detection Services. A licensed plumber can combine pressure tests with instruments to verify location and repair scope, saving time and limiting disruption in Port Clinton homes and businesses.
4. Step-by-Step Hunt: Track the Source Without Tearing Walls
Work from simple to complex. Begin with fixtures and appliances. Toilets cause many hidden losses. Add dye to the tank and wait ten minutes. Listen for fill valves cycling when nobody is using water. Check around the base for dampness. For faucets and showers, run water while watching traps and supply lines under the sink. Touch joints with a dry paper towel—any darkening indicates moisture.
Check the dishwasher and refrigerator supply line. If safe, slide them forward. Look for kinks, corrosion at compression fittings, or dusty lines that look matted from wetting and drying. Inspect the water heater. Rust tracks, a damp pan, or a slow drip at the temperature and pressure relief valve are red flags. If hot water is always available and the meter spins despite everything being off, the hot side may be leaking. If parts have failed, consider Water Heater Repair – Port Clinton, OH Plumber or Anode Rod Replacement Water Heater – Port Clinton, OH Plumber to restore performance and protection.
Next, separate supply from drain issues. Supply leaks continue when fixtures are off. Drain leaks only show when water flows. Try a timed test: fill a sink or tub and hold water for ten minutes with the stopper closed. If the meter doesn’t move during the hold, then open the drain while observing below. If moisture appears only while draining, focus on the trap, tailpiece, or downstream line. If dampness grows during the hold, suspect the overflow path or pressurized lines.
Use shutoff valves to isolate zones. Close the cold supply to a bathroom group and watch the meter. If movement stops, the leak sits in that branch. Reopen the cold, close the hot, and compare. Repeat for other fixture groups. This valve isolation method directs you to the right room or run without cutting large openings.
5. Hidden and Hard-to-Reach Leaks: Walls, Ceilings, Slabs, and Crawlspaces
Hidden leaks require reading the story materials tell. Sharp-edged stains often indicate an older, dried event. Soft, growing stains point to current moisture. A musty odor usually comes from persistently damp materials and limited airflow. Warped baseboards or bubbling paint can signal water wicking from below. Use your moisture meter to map and mark the wettest point. That spot isn’t always the source, but it guides smart, minimal opening.
Temperature reveals pathways. Run only hot water nearby for three minutes. Scan the adjacent wall or floor—warmer lanes can trace hot supply runs. For ceilings, note joist direction. Water can travel along framing and drip far from its origin. Inspect above a stain, then one bay over. Calm, methodical checks limit unnecessary cuts and repairs.
Slab and main-line leaks come with unique tells. A consistently warm tile area may indicate a hot line leak under the slab—bare feet make great sensors. If the meter turns with all interior valves closed, the service line between meter and structure may be the issue. Walk the yard over the service path for soft ground or a steady trickle at the curb stop. In crawlspaces, look for droplets on insulation tips, puddles atop vapor barriers, and mineral crust on copper joints.
When signs indicate a buried or slab leak, bring in a licensed plumber. Techniques like acoustic listening, thermal imaging, and tracer gas help zero in on the leak through hard surfaces, shrinking the access area and preserving finishes common in Port Clinton homes.
6. Found It—Now What? Mitigation, Drying, and When to Call a Pro
Once you’ve located the source, move quickly to minimize loss. Shut the nearest valve or the main. For a small pinhole in copper, a temporary pipe repair clamp can hold while you plan a permanent fix. Wrap towels under active drips and rotate them as they wet out. Move items off damp flooring. Use fans and open windows to drive drying. Lower indoor humidity to reduce the chance of mold. Photograph damage and keep short notes—documentation helps with planning and any claims.
If drywall is wet, consider small inspection holes at the base to drain and ventilate. Cut power to any wet receptacle or switch. Avoid running the furnace or central air if supply or return ducts are wet. For standing water, a wet/dry vacuum is useful. If a carpet pad remains wet or smells musty, it often needs removal. The first 24 hours matter most for drying and material salvage.
Call a licensed plumber for leaks inside walls, under slabs, near the electrical service, or when valves won’t hold. Licensed plumber leak repair includes diagnosis, controlled access, proper repair, and pressure testing. Ask about methods, replacement parts, and expected timelines; costs vary with access, materials, and the extent of damage. If your water heater failed, consider Water Heater Installation – Port Clinton, OH Plumber or Water Heater Repair – Port Clinton, OH Plumber. For older systems, a pro may recommend upgrades or water softener installation to reduce scale and protect valves and fixtures.
If a pipe bursts, act decisively: close the main and open low-to-high faucets to drain lines and lower pressure. This limits spray and further damage. Emergency Burst Pipe Repair and Leaks & Burst Pipes – Port Clinton, OH Plumber address urgent failures with the right parts, techniques, and testing to bring systems back online safely.
7. Prevent the Next Leak: Maintenance, Pressure Control, and Smart Monitoring
Prevention is steady and simple. Check under sinks every month. Feel for dampness and look for green or white mineral crust on metal fittings. Replace aging supply hoses with braided stainless lines. Keep toilet flappers and fill valves in working order. Flush sediment from the water heater annually per the manufacturer’s guidance to ease stress on the tank. If the anode rod is depleted, schedule Anode Rod Replacement Water Heater – Port Clinton, OH Plumber to help protect the tank from corrosion.
Control water pressure. High pressure strains joints and valves throughout the home. A pressure reducing valve (PRV) helps set a safe indoor range, often around 50–60 psi. A simple screw-on gauge for a hose bib will show your reading. If it’s high, a licensed plumber can adjust or replace the PRV. Consider Water Softener Installation – Port Clinton, OH Plumber if hard water is leaving scale on fixtures and valves.
Smart tools raise your early-warning game. Place smart leak detectors under sinks, by the water heater, and behind the washer. Some systems connect to auto-shutoff valves that close the main when a sensor trips. Track your utility bill month to month; a steady rise without new uses suggests a hidden loss. Keep a simple home log with occasional meter readings during quiet periods. Trends will reveal issues before they become emergencies in Port Clinton properties.
Port Clinton Plumbing works across Port Clinton every week helping owners track and fix leaks fast. Whether it’s a slow toilet fill, a concealed slab leak, or water damage from a failed hose, our trained technicians isolate the source and repair it with care so you can get back to normal.
Frequently Asked Questions
How do I tell if my toilet is leaking into the bowl?
Add dye to the tank and wait ten minutes without flushing. If color appears in the bowl, the flapper isn’t sealing. Also listen for a faint hiss or periodic refilling. Replacing the flapper and cleaning the seat surface solves most cases.
What should I do first when a pipe bursts?
Shut off the main water valve immediately. Open cold faucets from lowest to highest to drain and drop pressure. Turn off power to any wet area. Move items away from water, then contain spread with towels or a wet/dry vacuum. After stabilization, call a licensed plumber for repair and testing.
Who installs hot water heaters and handles permits?
A licensed plumber installs water heaters and manages code requirements. They size the unit, connect venting and gas or electric safely, and test for leaks. If replacing an older unit, ask about Water Heater Installation – Port Clinton, OH Plumber and any updates typically required in Port Clinton and across Ohio.
How do I fix a small leaking pipe joint myself?
Shut off water, dry the joint, and apply a temporary pipe repair clamp or an epoxy putty designed for plumbing. These are temporary measures to limit damage. Schedule a proper repair with a licensed plumber to replace the failed section and verify the system under pressure.
How often should I check the anode rod in a water heater?
Follow the manufacturer’s guidance. Many homeowners schedule an inspection a few years after installation, then as conditions require. If you have hard water or notice a rotten-egg odor in hot water, ask about Anode Rod Replacement Water Heater – Port Clinton, OH Plumber.
Key takeaways
- Confirm fast: use the meter test with all water off to identify hidden supply leaks.
- Stay safe: shut water and cut power to wet areas before inspections or opening finishes.
- Track smart: isolate zones with shutoff valves and timed hold-and-drain tests.
- Know limits: bring in a licensed plumber for hidden, slab, or service-line leaks.
- Prevent issues: maintain safe pressure and install smart leak sensors.
Conclusion
Finding a leak is a method, not a guess. Start at the meter, move from easy checks to valve isolation, and read material clues with patience. Port Clinton Plumbing serves homes and businesses throughout Port Clinton with leak detection, pipe repair, and water damage help. Contact us.
If you are not sure which of these you are dealing with, it is worth having someone look at it before it turns into a bigger job. Get in touch with Port Clinton Plumbing today and we will tell you where you stand.